


I'd like to give you a hearty welcome to our little corner of Astral Space. We seem to have been having some navigational issues, but they should be resolved soon. Pay no attention to that beeping or the red warning lights. And I have no idea who Will Robinson is or why that robot seems to keep telling him there is danger....
But anyways, I thought I would entertain you all with a tutorial on how to make one of my favorite Halloween decorations. These are some of those multi-purpose crafts that can be decoration, spell paraphenaila, or even protective ward or spell charm. Also I am currently doing my annual Halloween Tale and this year it is a "Choose Your Own Adventure" version. You can find the start to the story here.
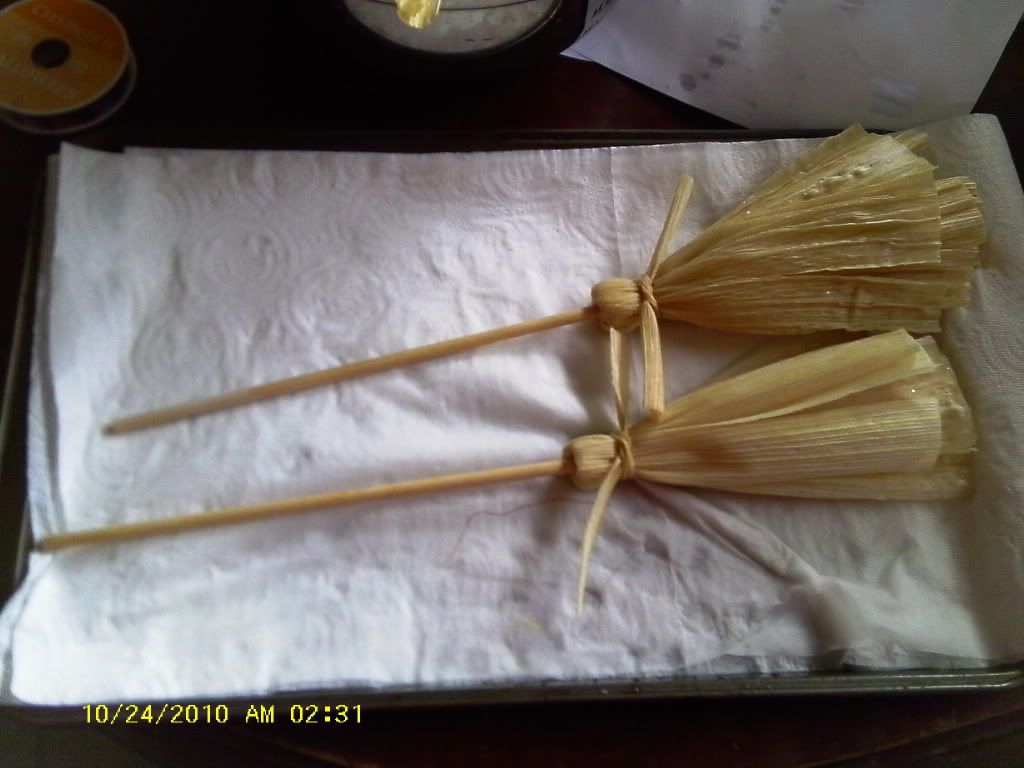
So without further ado (because there has been more than enough ado so far, and we here at Lost In Astral Space have pledged to become an ado free establishment at some undisclosed time in the near future) here is my walk through on making my Witchy Brooms!
What you will need:
Wooden dowels (1/4inch thick, about 12 inches long- you can get them in a package at your craft store)
3yrds of ribbon (any color or pattern you want)
A package of pre-dried corn husks (I use the ones that you get from the grocery store for making tamales)
A bowl of water (large enough to soak the corn husks in)
A drying rack (I use a cookie sheet with paper towels on it)
Hot glue gun and sticks
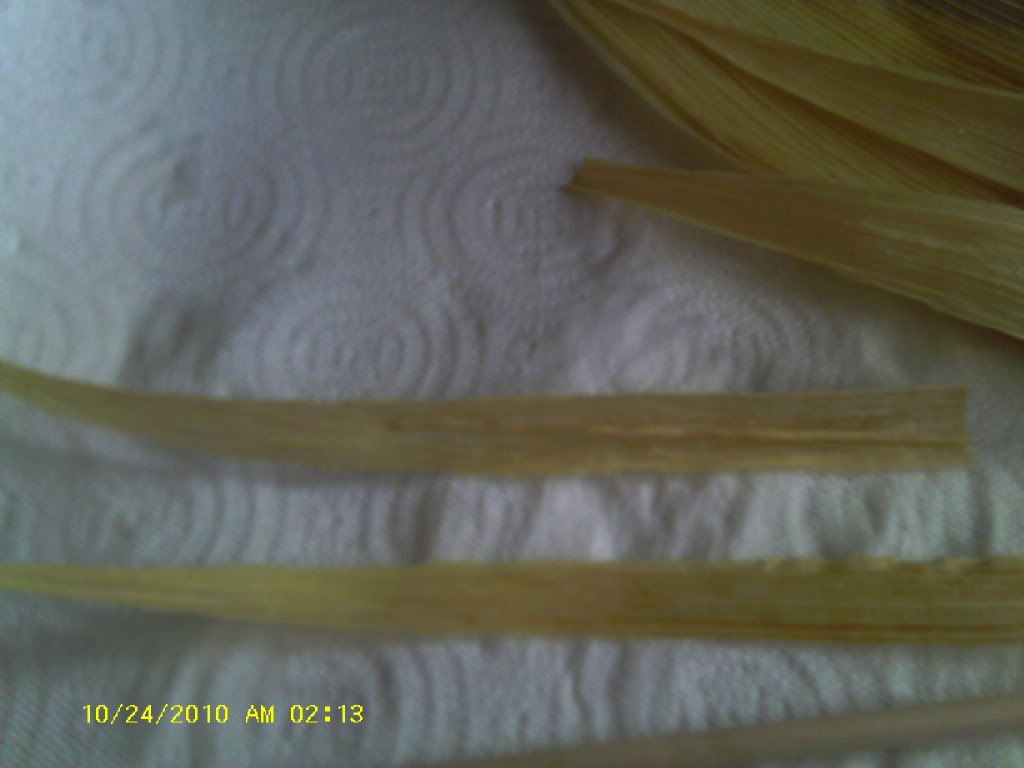
Step 1: Soak the corn husks in the bowl of water until they are soft and pliable.
Step 2: Take one of the corn husks and tear it into thin strips (you will need 2 per broom)
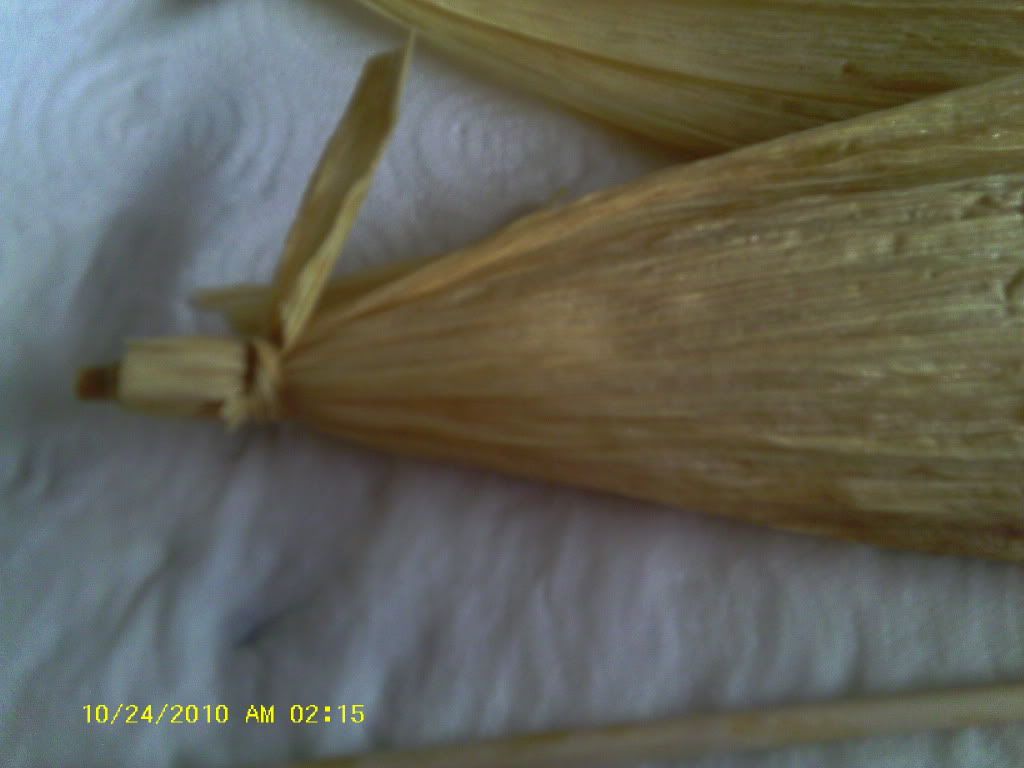
Step 3: Start wrapping the corn husks around one of the dowels with the thin end lined up to the end of the dowel, leaving the wide end laying along the length of the dowl

Step 4: Using one of the thin strips of husk, tie the strip around the thin ends about 1/4 of an inch from the end of the dowel.
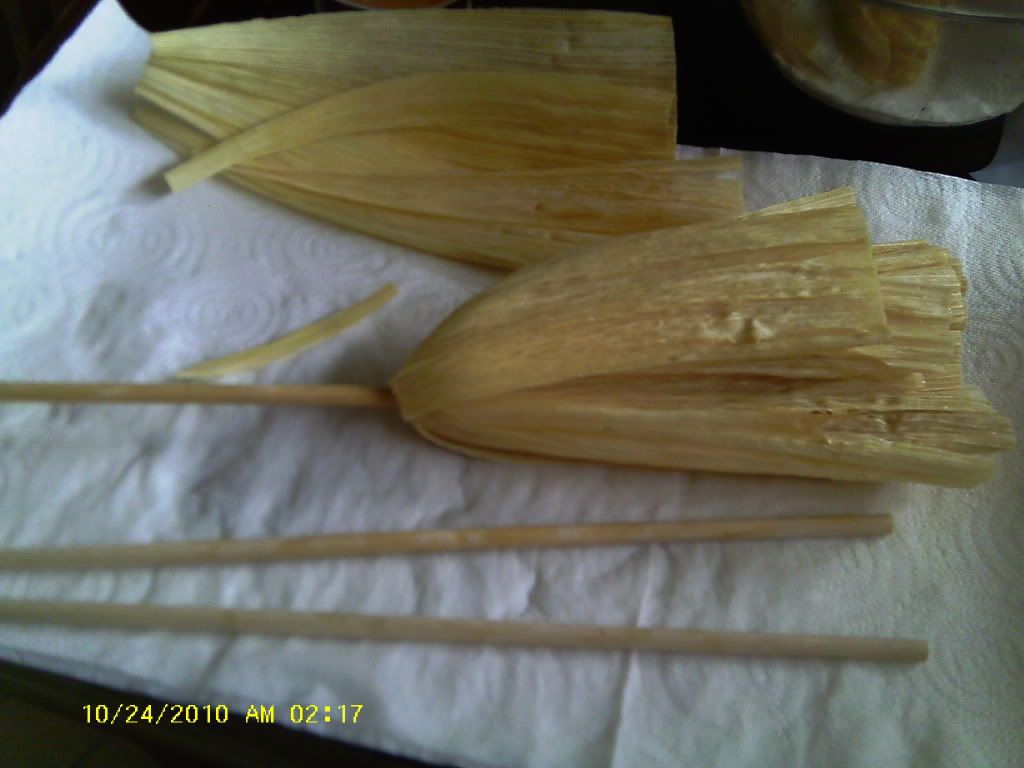
Step 5: Now push the dowel down until about another 1/4 inch is showing below the husks.

Step 6: Now begin to fold the husks down over the tie, until the other end of the dowel is now clear of husk and the end that you just pulled down in Step 5 is now hidden in the husks. This is a good time to tear the husks so that they seem fuller and more broom like.
Step 7: Now you'll use your other thin strip and you will tie the strip around the husks about 1/2-1 inch below where they meet the dowel. This will really make it look like a broom.
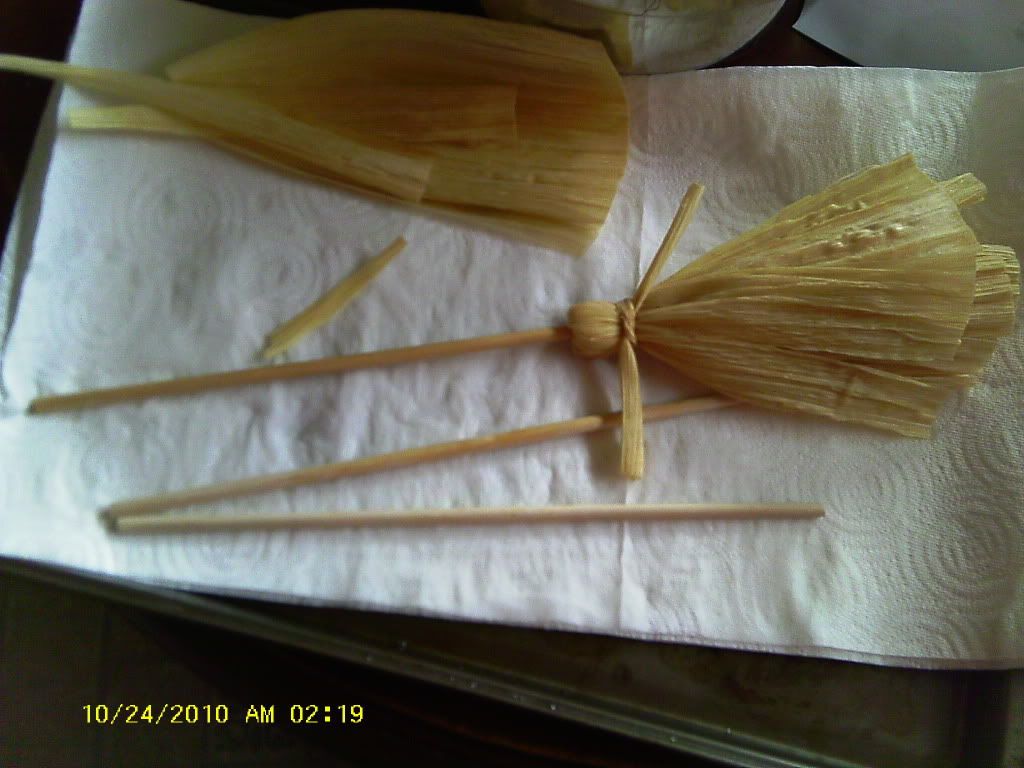
Step 8: Let them dry. I suggest over night, sometimes longer if you have a particularly thick set of husks.
Step 9: I usually, as soon as they are dry, use a hot glue gun to clue the upper (folded over) part of the broom to the dowel ensuring that it won't move around.
Step 10: Decorate! I use ribbon to wrap around the dowel and the "broom tie" so that mine end up looking like this:


I also like to add a little folded envelope (you can find a great tutorial on the one I use here) and stuff the little pockets with protective symbols or small stones, or anything that sets my purpose. I then punch holes in the top and string a ribbon through it and hang them from the brooms.
These can be just simple decorations, or you can charge them with intent and hang them as charms, or you can even use them as home made altar besoms for those of us who have limited ritual space! One of my favorite things to do is to soak the corn husks in tea or an herbal concoction instead of water. It leaves a sublte scent to the brooms. Also herbs or potpouri can be put into the envelope or can be hung from inside the "bristles". It's one of those multi-purpose crafts that I love !
And now to the giveaway!
I'm giving away one of my brooms pre-made!
You can have this sweet little broom all for your own!
Here are the rules:
1. be or become a follower of Lost In Astral Space
2. leave a comment on this post
2. Leave me a way to contact you- either a blog profile with email contact, or leave your email in your post!
Good luck and I hope you enjoy!


Good morning, and thanks for hosting us today!
ReplyDeleteWhat a great craft! I've made similar, tiny brooms for my corn husk dolls, but I never thought to make a larger version for myself! Brilliant!
Oh, and I am indeed a follower of your blog. =)
And for those coming over today, take three extra entries today by posting the word "besom" on any entry in the giveaways (use on on each or all on a favorite - it's up to you!) - but be sure to leave a comment here first for the extra entries to count!
good morning! awesome broomlets :) am already planning on making a batch for grandchild #2's next birthday...i am now following your blog (according to facebook, anyway, .will check back today to make sure fb isn't lying). the email is jlalexia(at)yahoo(dot)com for the broomlet giveaway.
ReplyDeleteGood morning! I'm visiting through Mrs. B's Haunted blog tour. What an adorable craft! Thank you for sharing it with us!
ReplyDeleteSlainte',
Kallan
I never thought something like this would be so simple to put together!
ReplyDeleteFollowing your blog =)
LOVE the brooms...I have a package of corn husks floating around somewhere..... now to find them! Your blog is great, btw.... thanks for the peek! Looking forward to more posts!
ReplyDeleteHi, came over from Mrs. B's haunted blog tour, and love your blog. I enjoy a creative and fun blogger very much, and am seriously going to try to make your wonderful besom. I would love to win yours though, so here's hoping I can be so lucky! Come visit my blog sometime. I have signed up to follow your blog. email me at robin.larkspur@gmail.com. I do have an accessible blog.
ReplyDeletehopped here from mrs b's blog - love your broom - I am a follower of your blog....and you can reach me at jibaro6543 @ gmail.com
ReplyDeletekeeping my fingers crossed...love your blog decor - very cute!!!
Visiting from Mrs. B's Im pretty sure Im a follower(will check). I'm so looking forward to still winning a giveaway this month.
ReplyDeleteWhat a charming project ~ thanks for sharing it with us!
ReplyDeleteThank you for a fabulous tutorial! I have definitely signed up to follow your blog and I'm so glad to have found you from Mrs B's. I'l lbe going to pick up some husks today. Great blog music as well!! :)
ReplyDeleteThis is AWESOME! I've always wanted to make a broom myself, but it seemed so daunting...and now you've made it easy! I'm definitely going to try this (and blog about it, so you may laugh at my efforts and the making of messes!).
ReplyDeleteAnd to have one of YOUR brooms, created on the astral plane? Too cool!
You know how to contact me...on my blog! http://hedgewitchhollow.blogspot.com
And of COURSE I'm following you!!!! You're awesome. :)
Great post and I love the broom idea! Thanks so much for participating in Mrs. B's 31 Days of Halloween!
ReplyDeleteHave a blessed week!
Love,
Bex
This post definitely made me LOL. I think it was the Will Robinson thing that pushed me over the edge. And what a neat craft idea!
ReplyDeleteThis was a great post! I hope you have a happy Halloween!
super duper cute project, those besoms are little works of art!
ReplyDeletelove the mini besoms! like Mrs. B i have made the tiny one's for my kitchen witches, but this is a great idea for a lil bit larger size! I'm following you now!
ReplyDeleteWhat an awesome and inexpensive project - I will definitely be using it in the future :)
ReplyDeleteThese are adorable! I'm now a follower, can't wait to see lots more.
ReplyDeleteCUTE! Love this.
ReplyDeleteOh!!! I am soooo going to make this! Thanks for the very, very clear instructions. I actually have everything I need. I'll try to blog it & link back for the instructions.
ReplyDeleteWild & Bright Blessings!
Beautiful! I'm now a follower!
ReplyDeleteSuch a lovely besom!! Of course I'd love to have a chance.
ReplyDeleteI'm a follower for some time already!
Kisses from Nydia.
PS: Your Halloween layout is awesome!