Now you all know I'm shy and retiring when it comes to political issues *snort*, but I felt the need to comment on something here.
If you haven't checked out Harvard's Folly or Mrs. B's event then you need to. Many of us, me often included, think that the burning times are over and it's just all about getting into the world religion knitting circle now. Well that is not true. There are still angry terrified idiots out there, and there are still poor innocents being loaded onto the pyre.
And truthfully those of us who are in a position to do something about it are being woefully silent. I honestly think this is because we are under the impression that here, in the US, we are safe. Our rights are protected and we can scoff at the small minded idiots and get on with living our lives. That is not, in fact, true. In our country we get only the right we defend. Every time we skip an election because it's just one of the "small ones", or we think that something is horrible and something should be done about it and then turn back to the casserole and put it out of our minds those rights get erroded little by little. The window gets opened to the extremists and bigots, then they jimmy the lock on the door to let all their crazier friends to come join the party.
Which has lead me to a song that has been increasingly playing in my head since I read that article about what's happening at Harvard- in Massachusetts, here in the USA.
I may have been raised in the 80's-90's, but I've always lived more in the 60's-70's. So here's the song that I think sums up how I feel about all of this...
There's something happening here
What it is ain't exactly clear
There's a man with a gun over there
Telling me I got to beware
I think it's time we stop, children, what's that sound
Everybody look what's going down
There's battle lines being drawn
Nobody's right if everybody's wrong
Young people speaking their minds
Getting so much resistance from behind
I think it's time we stop, hey, what's that sound
Everybody look what's going down
What a field-day for the heat
A thousand people in the street
Singing songs and carrying signs
Mostly say, hooray for our side
It's time we stop, hey, what's that sound
Everybody look what's going down
Paranoia strikes deep
Into your life it will creep
It starts when you're always afraid
You step out of line, the man come and take you away
We better stop, hey, what's that sound
Everybody look what's going down
Stop, hey, what's that sound
Everybody look what's going down
Stop, now, what's that sound
Everybody look what's going down
Stop, children, what's that sound
Everybody look what's going down
Thursday, March 31, 2011
Tuesday, March 29, 2011
Travel Log 3-29: Chldren's TV Tuesday
Seeing as I have 2 small savage creatures sweet little boys living in my house, I see probably more than my fair share of children's tv. Now as an adult, watching these shows is a completely different experience than my little monsters little sweetlings are having. Being an adult I am beset by questions and critiques that would never occur to a child and they generally make me want to sit down with the writers of these shows and shout WHY???!!! at the top of my lungs.
So now I'm going to share it with you.
We'll start with the one that gets to me the most and see how many Tuesday's we can eat up with them, shall we?
Here we go-
Max & Ruby on NickJr.

A sweet show about a pair of brother/sister bunnies and their adventures in a cutesie 1950's-esque town full of other bunnies. Ruby is the often managing older sister that cares for her slightly mischievous little brother in between her tea parties and Bunny Scout activities. Their approximate ages are about 6 for Ruby and somewhere between 3-4 for Max. Which leads me to my main question-
Where are these kid's parents?????
They live in their own house with only 2 bedrooms, occupied by themselves, and no one else. No adult lives with them. Now these two seemingly orphaned bunnies are not without relatives. Their grandmother lives right down the street in fact. She pops in on them periodically, or has them over to play in her attic, but is not an everyday part of their lives. There are various other adults that the kids see periodically but NO ONE mentions their parents, or lack there of. Which drives me nuts and really makes me want to know what the heck happened. Were they caught by lucky charm vendors? Since it's 50's themed maybe they were in the war and died. It just drives me nuts not to know.
Besides my devouring curiosity about these bunnies parental units, the show is pretty cute. There are a lot of old fashioned activities and games, as well as a little peek into 50's social activities (Ruby learns quite often how to be a "proper hostess"). And Max's antics can be pretty funny. As advanced as he is with various rube goldberg style set ups he's already a physics prodigy and therefore needs to get in the MIT preschool pronto.
So now I'm going to share it with you.
We'll start with the one that gets to me the most and see how many Tuesday's we can eat up with them, shall we?
Here we go-
Max & Ruby on NickJr.
A sweet show about a pair of brother/sister bunnies and their adventures in a cutesie 1950's-esque town full of other bunnies. Ruby is the often managing older sister that cares for her slightly mischievous little brother in between her tea parties and Bunny Scout activities. Their approximate ages are about 6 for Ruby and somewhere between 3-4 for Max. Which leads me to my main question-
Where are these kid's parents?????
They live in their own house with only 2 bedrooms, occupied by themselves, and no one else. No adult lives with them. Now these two seemingly orphaned bunnies are not without relatives. Their grandmother lives right down the street in fact. She pops in on them periodically, or has them over to play in her attic, but is not an everyday part of their lives. There are various other adults that the kids see periodically but NO ONE mentions their parents, or lack there of. Which drives me nuts and really makes me want to know what the heck happened. Were they caught by lucky charm vendors? Since it's 50's themed maybe they were in the war and died. It just drives me nuts not to know.
Besides my devouring curiosity about these bunnies parental units, the show is pretty cute. There are a lot of old fashioned activities and games, as well as a little peek into 50's social activities (Ruby learns quite often how to be a "proper hostess"). And Max's antics can be pretty funny. As advanced as he is with various rube goldberg style set ups he's already a physics prodigy and therefore needs to get in the MIT preschool pronto.
Monday, March 28, 2011
Travel Log 3-28-2: Thrifty Witch
Well here is the craft post I warned you all would be coming, lol!
While out and about in the thrift stores yesterday I got a bit of inspiration and decided to try something I hadn't personally seen anywhere.
Now I spend a lot of time online drooling over all the pretty ritual tools I see all over the place. They are beautiful and awesome and I look at them and think how much more witchy I would be with them. Then I see the price tag and snap out of it pretty darn quick. Things are going pretty good here, financially wise, but we still aren't at the spending on non-essential level yet. So spending 20-30 bucks on a ritual tool just isn't something that I can justify- especially when there are so many books out there I can rationalize spending the money on instead, lol.
But besides the financial aspect, I truly feel that the best tools are the ones that we have some personal investment in, that in some way we infuse with a portion of ourselves. Like how a lot of people dedicate their tools. While I don't do that, I do feel I can achieve the same thing by making as many of my tools as I can.
So here's my how to on the bit of inspiration that struck yesterday on how to make your own customized offering dish for under $5.
What you will need:
 1. A glass bowl the size you want for your altar. I got mine from the thrift store for 58 cents. Make sure it's clean and dry.
2. Patterned paper that you like and would like to have the bowl look like. I just printed some out which made my paper one sided so I needed 4 pieces, but if your paper is double sided you only need 2.
3. Modge Podge or a decoupage medium (hence forth known as modge podge because I'm kinda lazy like that) of your choice and a brush to go with it.
4. Scissors to cut things!
Now here's what you do:
Step 1.
Lay your bowl down upside down on your paper over whatever part of your pattern you really like and trace around the rim. Pick up the bowl and cut out the circle. You'll need 4 of those circles if you're using one sided paper, 2 if you're using double sided. Then put the bowl on the paper right side up and trace around the base, then cut out 2 of those circles.
Step 2.
Take your big circles and fold them into quarters like this-
 Then cut along the folds to have 4 "pizza slice" shaped pieces (everything makes more sense to me when referenced to food, lol) for each circle.
Step 3.
Here's where it gets a little different depending on if you're using one sided or 2 sided. I'll do 1 sided first.
1 sided-
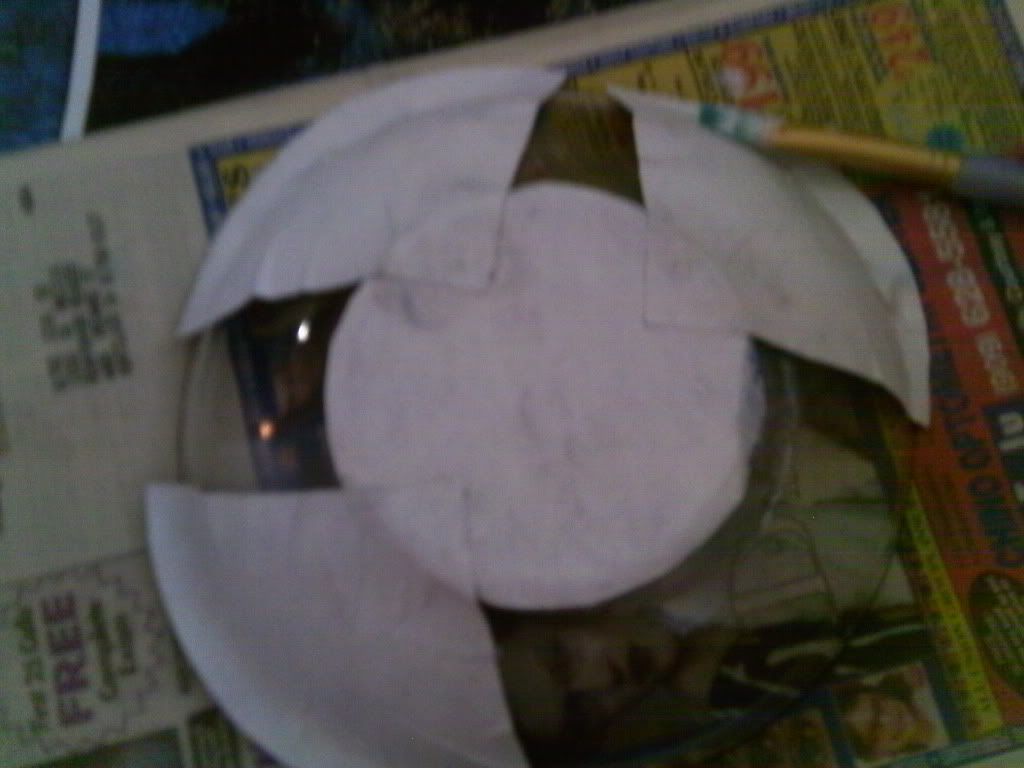
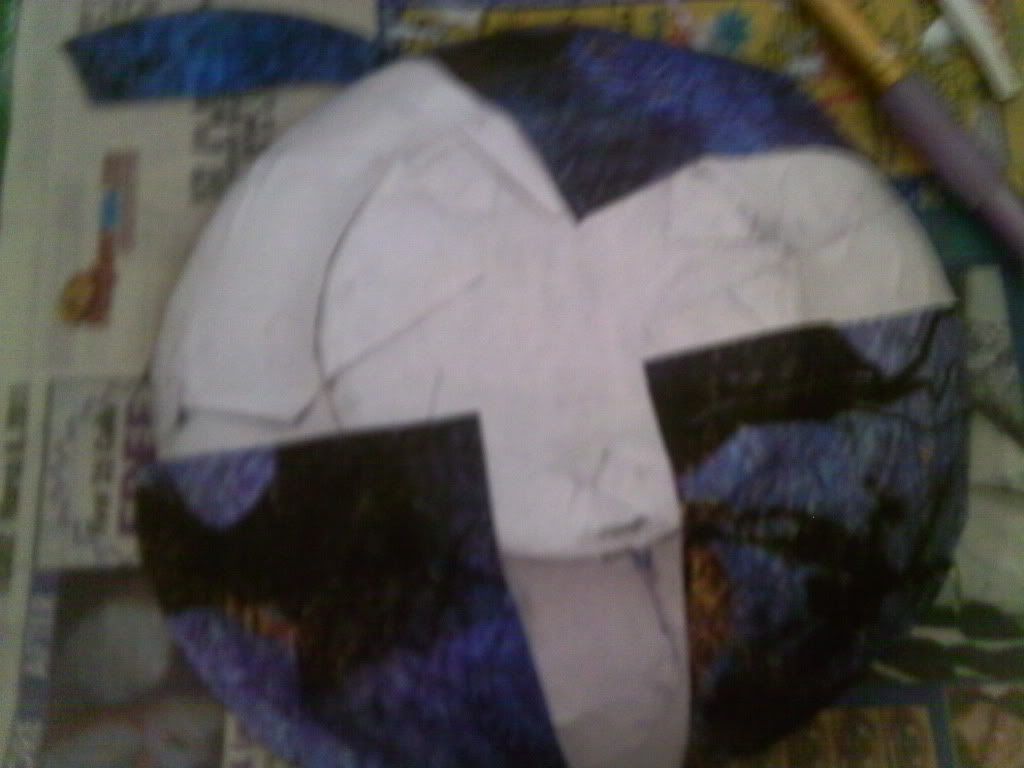
Now grab your modge podge and brush and paint up the outside base of your dish and take one of your small circles and put it on with the pattern you want to be visible from the inside of the dish facing down and pat it until it's smooth. Then choose 4 wedges that you like and position them like the 4 points of the compass with the "pointy" ends over your small circle and your wide end over the edge of the glass. Secure them in place by painting modge podge where you want to put them and then pressing them into it until they are flat.
It should look kinda like this-
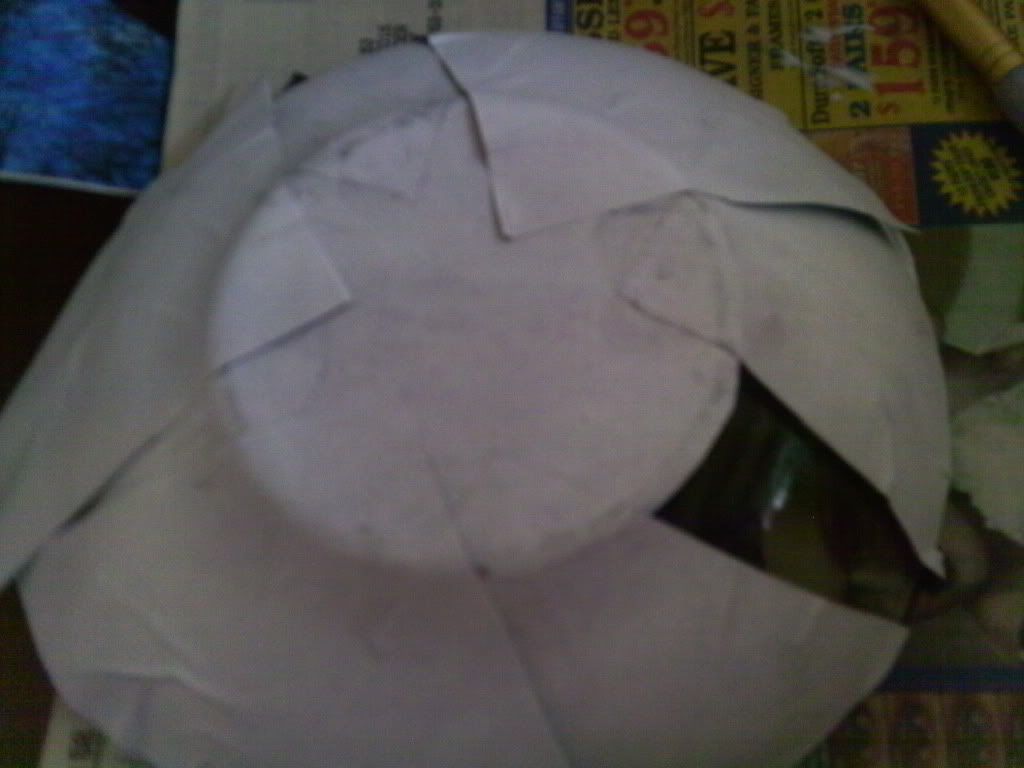
 Then take 4 more wedges and position them to fill in the "blank" spaces until your back like this-
2 sided-
You'll take one of your small circles and use your modge podge to paint the bottom of the bowl and press the paper into it with the pattern you want to see from the inside of the bowl down. Now take 4 of your pizza slices and position them around your bowl like the points on a compass, with the pattern you want on the inside of the bowl facing down and the pointy bit on the bottom of the bowl. Paint the area you want them with your modge podge one at a time and then press the pieces down until they are flat. Once your first 4 pieces are in place repeat the process with your other 4 wedges until all the "blank" spaces are filled in. Now skip down to Step 5
Step 4.
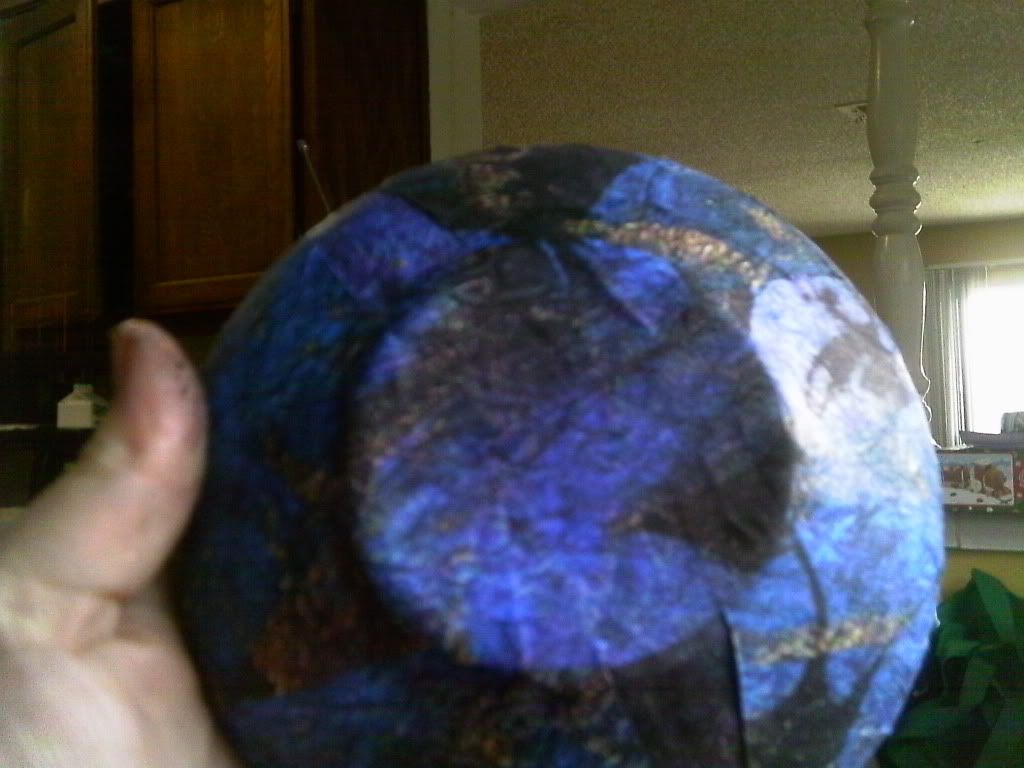
Not you have a great looking inside of your bowl, like this-
 but the outside is all white.
This is why you needed those 8 other pizza slices.
First you'll flip your bowl back over and grab 4 more wedges. You'll begin positioning these around the outside of the bowl just like you did in the last step, but with the pattern facing outward, like this-
 Once the first 4 are in place you'll repeat again filling in the blanks until no white is showing except on the very bottom (for me this made a cool star shape that I proceeded to not get a pic of, lol).
Step 5.
Now it's time to use that second small circle you cut out. Paint the bottom of the bowl with your modge podge and place the circle with your chosen pattern facing out and pat it down until it is smooth.
Take your scissors and trim the excess off around the rim of the bowl until all the paper is "flush" or smooth to the edge of the rim with none above it.
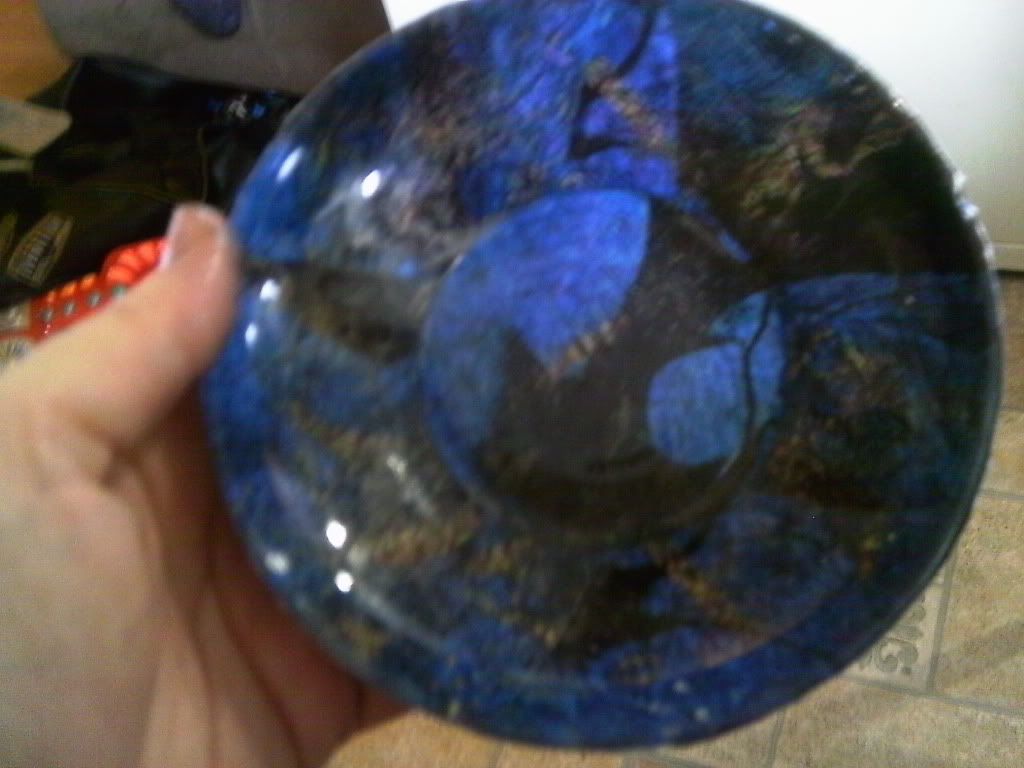
And now you should have something that looks like this-
 Step 6 (optional).
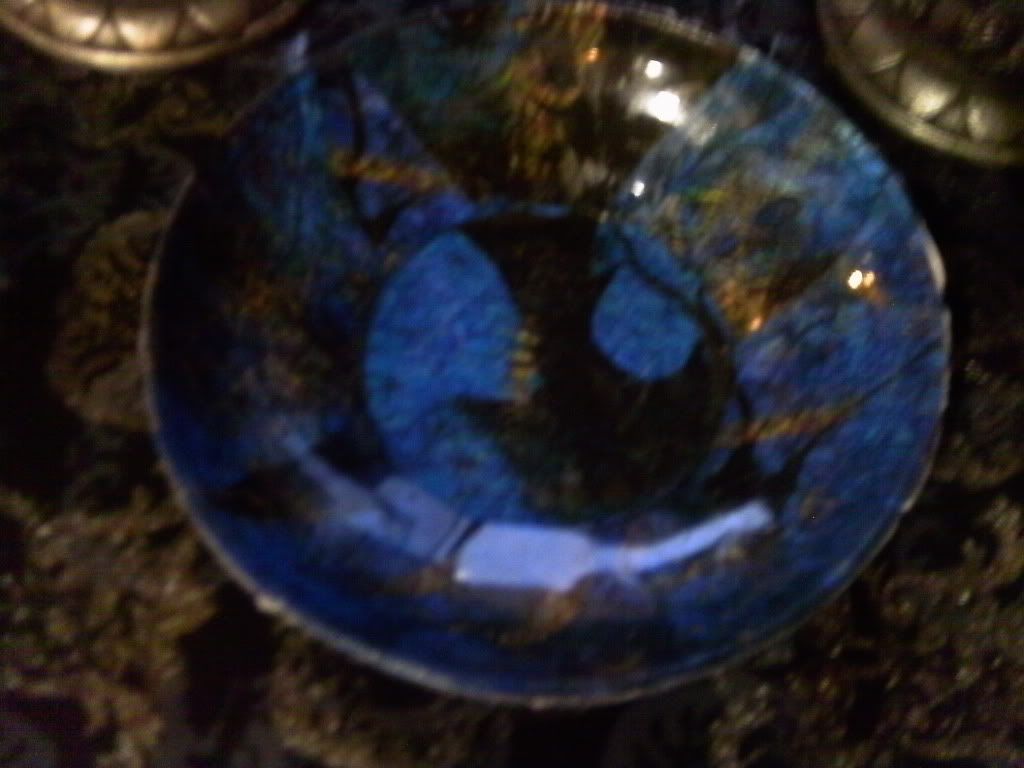
Now I didn't like the mat finish on the paper, and because the modge podge I got was the glossy kind I just painted the outside all over with it and let it dry shiny.
So now I have this lovely offering bowl for less than $2.00!!
While out and about in the thrift stores yesterday I got a bit of inspiration and decided to try something I hadn't personally seen anywhere.
Now I spend a lot of time online drooling over all the pretty ritual tools I see all over the place. They are beautiful and awesome and I look at them and think how much more witchy I would be with them. Then I see the price tag and snap out of it pretty darn quick. Things are going pretty good here, financially wise, but we still aren't at the spending on non-essential level yet. So spending 20-30 bucks on a ritual tool just isn't something that I can justify- especially when there are so many books out there I can rationalize spending the money on instead, lol.
But besides the financial aspect, I truly feel that the best tools are the ones that we have some personal investment in, that in some way we infuse with a portion of ourselves. Like how a lot of people dedicate their tools. While I don't do that, I do feel I can achieve the same thing by making as many of my tools as I can.
So here's my how to on the bit of inspiration that struck yesterday on how to make your own customized offering dish for under $5.
What you will need:
2. Patterned paper that you like and would like to have the bowl look like. I just printed some out which made my paper one sided so I needed 4 pieces, but if your paper is double sided you only need 2.
3. Modge Podge or a decoupage medium (hence forth known as modge podge because I'm kinda lazy like that) of your choice and a brush to go with it.
4. Scissors to cut things!
Now here's what you do:
Step 1.
Lay your bowl down upside down on your paper over whatever part of your pattern you really like and trace around the rim. Pick up the bowl and cut out the circle. You'll need 4 of those circles if you're using one sided paper, 2 if you're using double sided. Then put the bowl on the paper right side up and trace around the base, then cut out 2 of those circles.
Step 2.
Take your big circles and fold them into quarters like this-
Step 3.
Here's where it gets a little different depending on if you're using one sided or 2 sided. I'll do 1 sided first.
1 sided-
Now grab your modge podge and brush and paint up the outside base of your dish and take one of your small circles and put it on with the pattern you want to be visible from the inside of the dish facing down and pat it until it's smooth. Then choose 4 wedges that you like and position them like the 4 points of the compass with the "pointy" ends over your small circle and your wide end over the edge of the glass. Secure them in place by painting modge podge where you want to put them and then pressing them into it until they are flat.
It should look kinda like this-
2 sided-
You'll take one of your small circles and use your modge podge to paint the bottom of the bowl and press the paper into it with the pattern you want to see from the inside of the bowl down. Now take 4 of your pizza slices and position them around your bowl like the points on a compass, with the pattern you want on the inside of the bowl facing down and the pointy bit on the bottom of the bowl. Paint the area you want them with your modge podge one at a time and then press the pieces down until they are flat. Once your first 4 pieces are in place repeat the process with your other 4 wedges until all the "blank" spaces are filled in. Now skip down to Step 5
Step 4.
Not you have a great looking inside of your bowl, like this-
This is why you needed those 8 other pizza slices.
First you'll flip your bowl back over and grab 4 more wedges. You'll begin positioning these around the outside of the bowl just like you did in the last step, but with the pattern facing outward, like this-
Step 5.
Now it's time to use that second small circle you cut out. Paint the bottom of the bowl with your modge podge and place the circle with your chosen pattern facing out and pat it down until it is smooth.
Take your scissors and trim the excess off around the rim of the bowl until all the paper is "flush" or smooth to the edge of the rim with none above it.
And now you should have something that looks like this-
Now I didn't like the mat finish on the paper, and because the modge podge I got was the glossy kind I just painted the outside all over with it and let it dry shiny.
So now I have this lovely offering bowl for less than $2.00!!
Sunday, March 27, 2011
Travel Log 3-28: Thrifty Thrifty Thrifty
Well it's been a busy weekend over here. We hit the thrift stores and I came away with some pretty cool finds.
Our kitchen walls are covered in cabinets except for this one corner by the doorway and I've been wanting to put a shelf there for my cook books for a while. Well guess what I found this weekend....
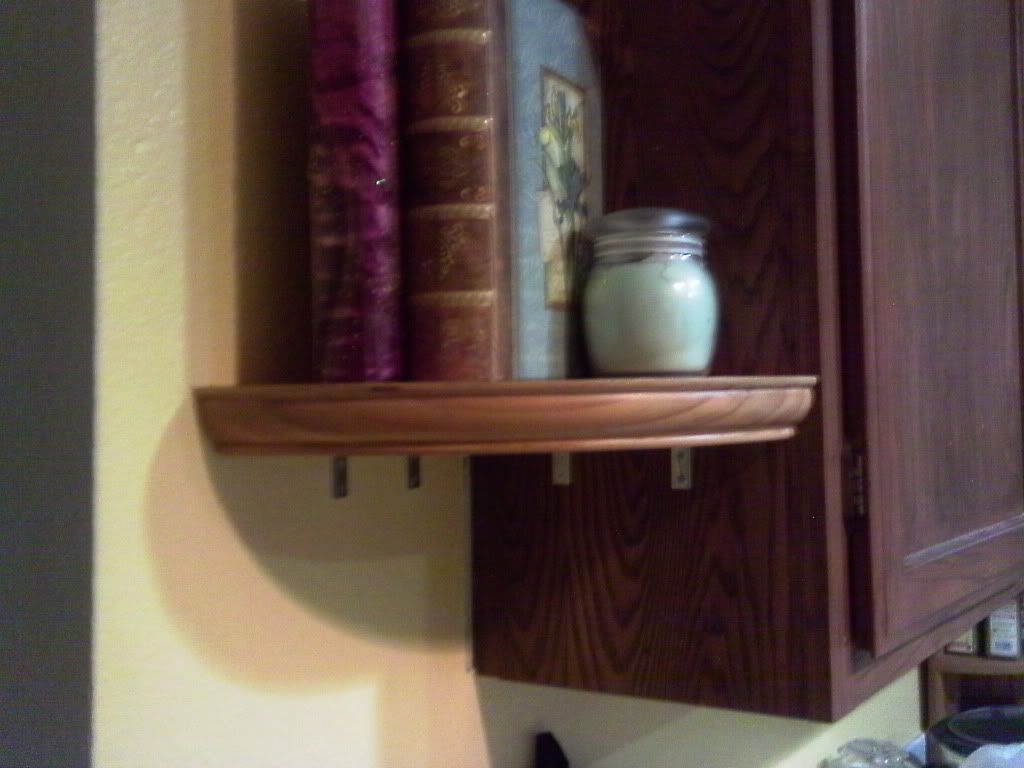 My lovely hubby put up this newsed (a term I picked up from my days in the car business, lol) corner shelf for my cook books! Guess how much this lovely cost us? Go ahead, guess. Under $5.00 including picking up the hardware from Walmart.
We also picked up this lovely silverware box for $7.00

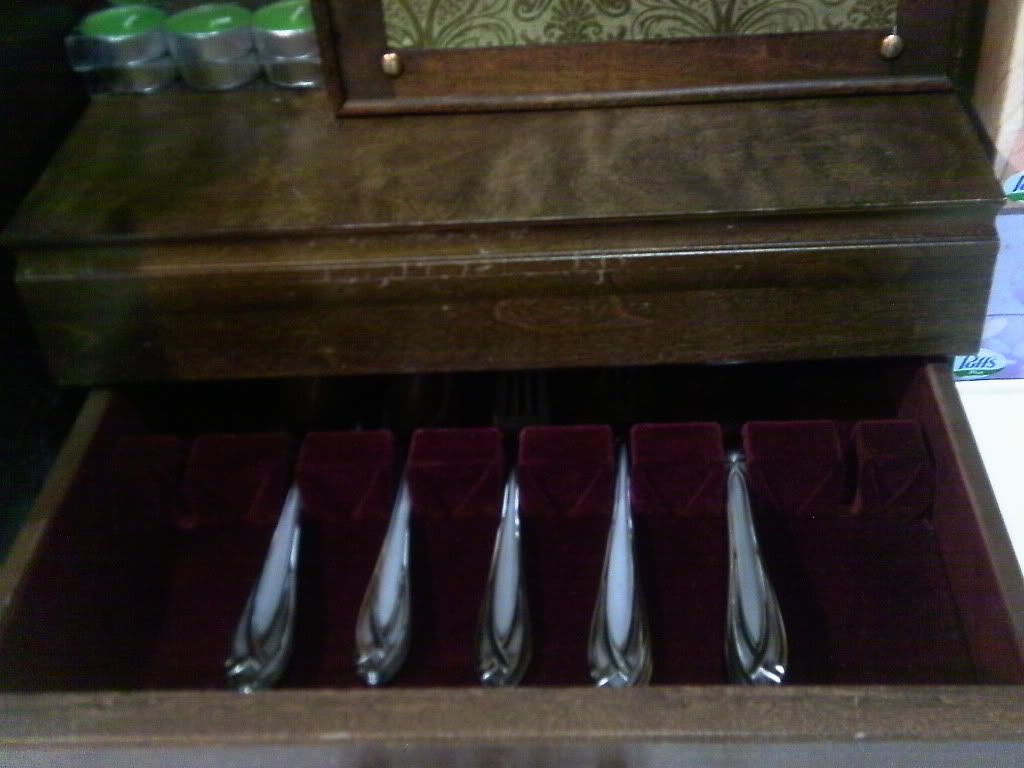 I'll be painting or decoupaging it at a later date (mainly because I can't pick what I want to do with it). Oh and the box on top of it is one of the boxes I got from Micheal's on sale a while ago and currently houses my dried herbs.
And my personal favorite find, that the hubby snagged out of a random jumble box of kitchen utensils..drum roll please...
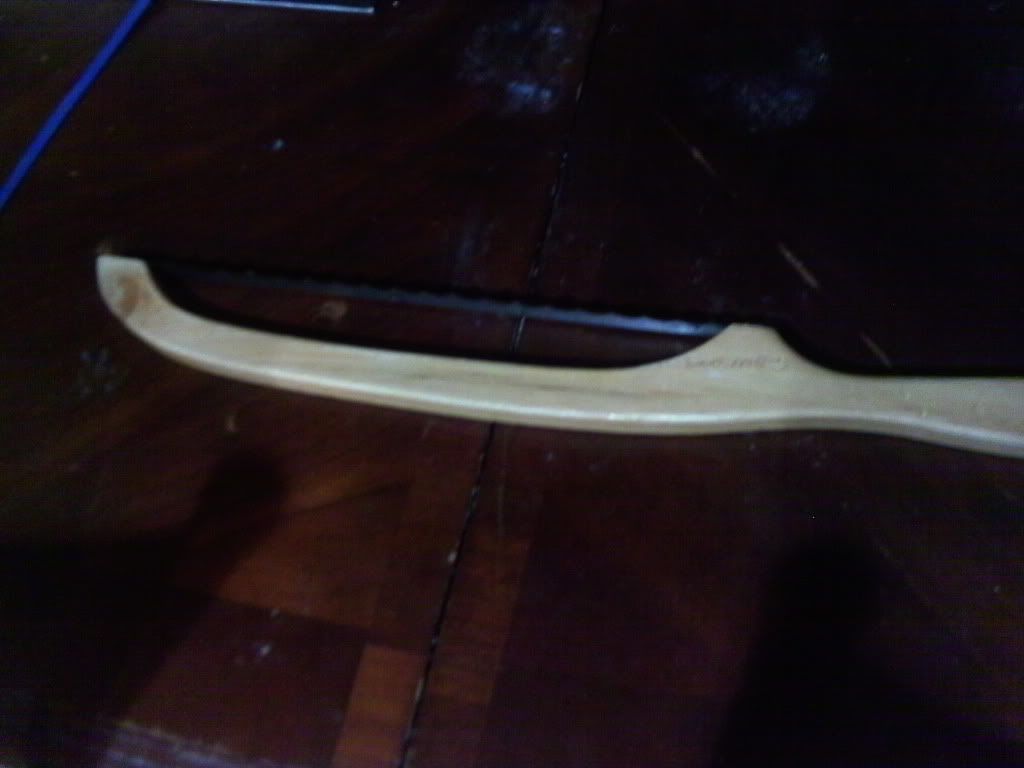
A BREAD SLICER! I've been looking for some way to make slicing my home made bread easier to slice, and here it is for $2.00. Woot!
I also came up with a pretty nifty craft that is super cheap and turns out pretty darn well if I do say so myself. I'll have a tutorial and pics tomorrow. I gotta go finish making my bread and whip up some muffins for breakfast tomorrow.
Feels good to be back to myself.
Our kitchen walls are covered in cabinets except for this one corner by the doorway and I've been wanting to put a shelf there for my cook books for a while. Well guess what I found this weekend....
We also picked up this lovely silverware box for $7.00
And my personal favorite find, that the hubby snagged out of a random jumble box of kitchen utensils..drum roll please...
A BREAD SLICER! I've been looking for some way to make slicing my home made bread easier to slice, and here it is for $2.00. Woot!
I also came up with a pretty nifty craft that is super cheap and turns out pretty darn well if I do say so myself. I'll have a tutorial and pics tomorrow. I gotta go finish making my bread and whip up some muffins for breakfast tomorrow.
Feels good to be back to myself.
Subscribe to:
Posts (Atom)